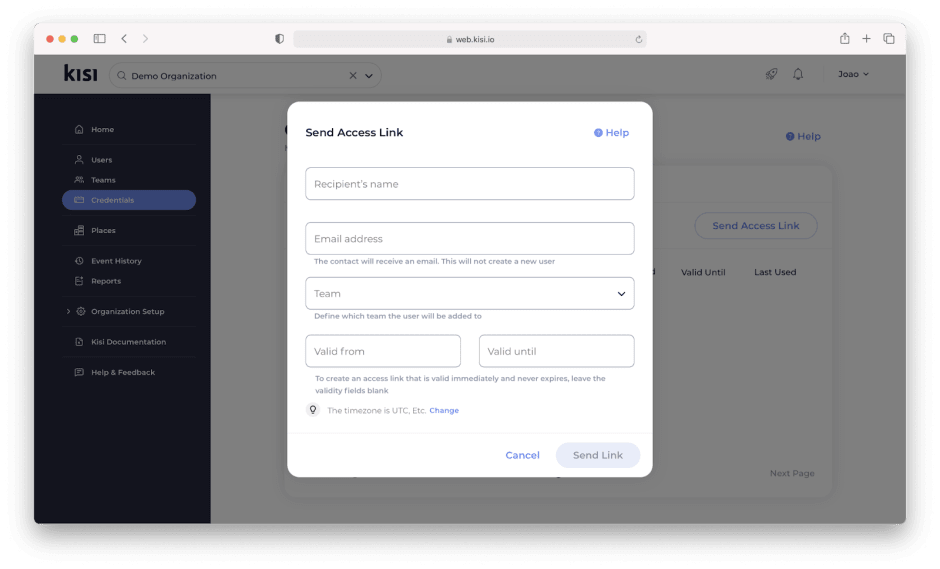
We've made some quality of life changes to how you issue visitor passes in Kisi. Through the Kisi dashboard, you can quickly and easily grant time and door-restricted access to any visitors.

The new process for granting visitor passes is as follows:
- Navigate to the "Credentials" tab on your Kisi dashboard
- Click on the "Access Links" tab
- Enter the field information requested (you can leave the "Valid" fields blank if you never want the pass to expire)
- Click "Send Link"
- The visitor will receive an email with a hyperlink they can click on
- Clicking the hyperlink will bring them to a restricted dashboard where they can unlock any doors they have access to
Permissions are based on the Group- or Team-level permissions in your account. The recipient will have the ability to open the same doors as the Group/Team you select when issuing the pass.
Visitors are not added as a member of your Group/Team or your organization. Visitor links tied to a specific Group/Team can be found on the Group/Team page.
Get started now!
Start improving your visitors’ (and your own) life right away with Kisi! Head to our Help space to learn how to set up Access links.
We’d love to know what you think!
As always, we welcome your feedback and comments. Please share your thoughts with us at feedback@kisi.io so we can make Kisi even better!
*Please note: Visitor links do not require authentication. Additionally, geofence and Reader restrictions are not applied to the links. If you leave both the "Valid from" and "Valid until" fields blank, the passes WILL NOT EXPIRE.*
Related articles


