

Security cameras are an essential component of modern surveillance, providing visual monitoring and recording capabilities for enhanced security. Advanced access control systems integrate with cloud-connected cameras from several manufacturers, so every door event can be checked against what the camera saw. The integration offers synchronized management of access control and video surveillance, empowering you to efficiently monitor and control physical security within your organization, but let's break it down in more detail below.
What are cloud cameras? #
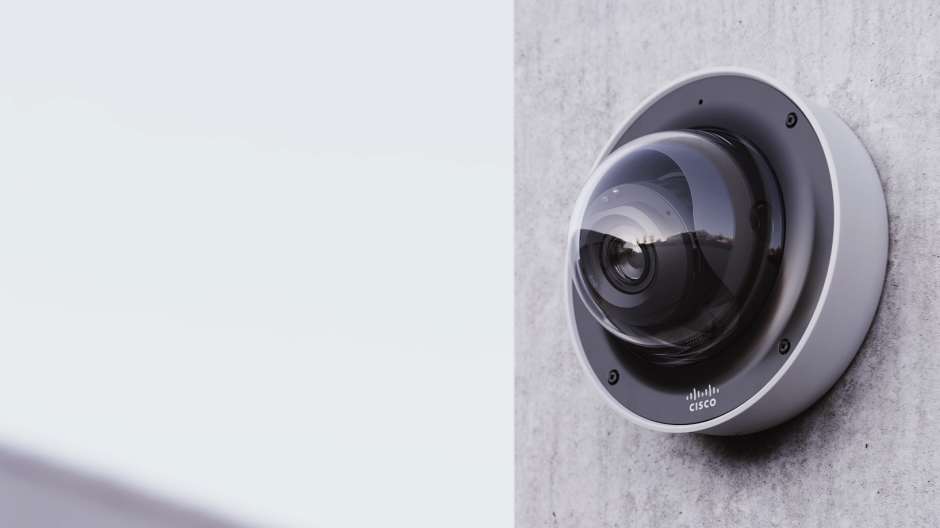
Surveillance cameras that can connect to cloud servers are called ‘cloud cameras.’ Leveraging cloud technology, these cameras provide a range of features and benefits for remote monitoring, management, and storage of video footage, making them the perfect addition to your modern access control system.
Cisco Meraki’s smart cameras are cloud-based and often integrated with access control. With features like live monitoring, remote access, video analytics, and clear HD footage, Meraki cameras are a future-proof upgrade for efficient and scalable video monitoring. Cisco Meraki cameras also feature seamless integrations with various applications, allowing for enhanced functionality and a more comprehensive security ecosystem.
Meraki is one of several camera platforms that connect to Kisi. VORTEX by VIVOTEK is the only one whose live video streams play inside the Kisi dashboard, and its NVR can also bring in footage from ONVIF-compliant IP cameras made by other manufacturers, which matters if you already have cameras on the wall and don’t want to replace them. Rhombus, Eagle Eye Networks, Lumana and Spot AI round out the list, so the choice usually comes down to which camera ecosystem your IT team already manages.
Watch the video below for more information on Cisco Meraki cameras, their benefits, use cases, and installation tips.
How do cloud cameras work with access control systems? #
Integrating your cloud cameras and access control system gives you a more holistic approach to security, with real-time access monitoring, enhanced situational awareness, and data collection to help with investigating security incidents. This integration is critical to businesses and organizations that require enhanced security, like educational institutions, healthcare facilities, and government buildings.
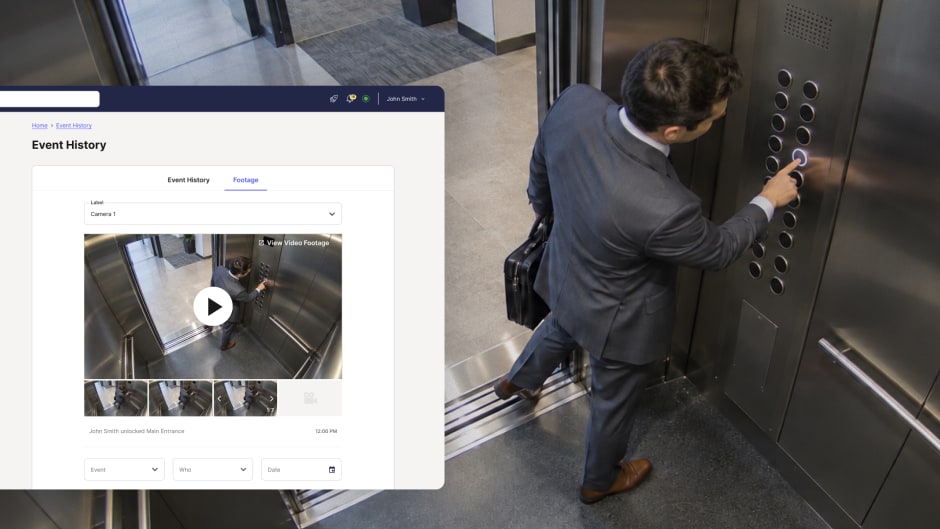
Kisi’s integration with Cisco Meraki cameras gives you a unified physical security solution with a complete visual audit trail. From verifying that the person unlocking the door matches the credentials being used to investigating unauthorized access attempts.
The link between a door reader and a camera is made in software rather than through wiring. You assign each camera to the door it watches, and while a camera can only be tied to one door, a busy entrance can have several cameras pointed at it, so a single badge tap at the reader can be checked from more than one angle.
When you link your Cisco Meraki cameras to key access points in your space, Kisi automatically syncs snapshots from your entry point camera, offering images of the moment the user operated the Kisi access device. You decide how many snapshots Kisi takes around each event and can shift the timing a few seconds earlier or later, which helps when a door camera is mounted further back from the reader. Every snapshot is logged in Kisi’s event history and marked with a camera icon.
Snapshots aren’t limited to successful unlocks. With Meraki, Rhombus and Eagle Eye Networks, Kisi also captures images when an unlock fails, when a door is opened, held open or forced open, and when a tailgating incident is detected, which are the events you’re most likely to need evidence for later. Because Kisi pulls these images from the camera provider’s API, they can take up to ten minutes to appear with Meraki.
In the event of an unauthorized access attempt, Kisi’s event history documents the user that attempted to open the door and the time stamp. It can also send an alert message and visual snapshots of the event using the clear Cisco Meraki image.
If you want to watch doors as events happen rather than review them afterwards, Kisi’s Live Monitoring page shows live camera streams next to a running feed of unlock events, including who tried to enter, at which door and whether access was granted. VORTEX by VIVOTEK is currently the only camera integration that streams live video there, although the event feed works for any place, with or without a compatible camera.
Using Cisco Meraki cameras with Kisi unifies physical security endpoints in one dashboard, improves event logs and audits with visual snapshots, adds more context to security-related events, and offers complete visibility for tailgating.

Find the right camera solution for your facility
Compare strengths, limitations, and requirements across top providers.
Integrating cloud cameras with access control #
The steps below use Cisco Meraki as an example. Rhombus, Eagle Eye Networks and VORTEX by VIVOTEK connect in a similar way, by linking the camera account to Kisi and mapping each camera to a door, and each one has its own setup guide in Kisi’s product documentation.
To get your Cisco Meraki cameras integrated with Kisi, you need:
- A Cisco Meraki account with administrator access
- Administrator access to your Kisi place
- A Kisi organization API key
- At least one Meraki camera already set up at the location
Enable API access #
- Sign in to your Cisco Meraki Dashboard as an Administrator.
- Under 'Organization', click on 'Settings'.
- In the ‘Settings’ page, scroll down to the ‘Dashboard API access’ section and check the box ‘Enable access to the Cisco Meraki Dashboard API’.
- Click on ‘Save Changes’.
Generate a Cisco Meraki API key #
- From the Cisco Meraki Dashboard, click on your email address in the top right corner and select 'My Profile'.
- Scroll down to the ‘API access’ section and click on ‘Generate new API key’.
- Copy your Cisco Meraki API key from the popup window, and check the box 'I have stored my new API key'.
- Click ‘Done’.
Set up the integration in Kisi #
- Sign in to Kisi.
- Click the integrations icon (the 3x3 grid of dots) and select ‘Add Integration’.
- Enter a name, open the ‘Type’ dropdown, and select ‘Cisco Meraki’.
- Paste the Cisco Meraki API key that you previously obtained.
- Click ‘Add Camera’, then choose the Meraki organization and the Meraki camera you want to connect.
- Select the place and the door that camera covers.
- Set the number of snapshots to take around each event, and an offset in seconds if you want them captured slightly before (negative value) or after (positive value) the event.
- Click ‘Save’.
Note: A single integration is enough to add multiple cameras in the same Kisi organization. Click ‘Add Camera’ again for each additional camera.
Import cameras #
You no longer need to import Meraki cameras separately, because Kisi adds each camera to your hardware list as soon as you save it in the integration. In Kisi, you can only connect one door to a camera, but doors might have multiple cameras associated. To change a camera’s door, snapshot count or offset later, click the camera in the list and update it in the dialog that opens.
When the associated door is unlocked, snapshots will be created and appear in the ‘Event History’. Events with snapshots are marked with a camera icon. If you have many camera-equipped doors and notice long delays before snapshots appear, the integration may be hitting Meraki’s API rate limits, and lowering the snapshot count to three per event usually solves it.
Frequently asked questions #
Which access control systems integrate with security cameras? #
Most cloud-based access control platforms now integrate with at least a few camera brands, so the more useful question is whether a system supports the cameras you already run. Kisi connects with Cisco Meraki, VORTEX by VIVOTEK, Rhombus, Eagle Eye Networks, Lumana and Spot AI, and the full list sits on the Kisi integrations page.
Can I integrate my existing security cameras with access control? #
Often you can, without replacing the cameras. If they come from one of the supported brands, you connect the camera account to Kisi and map each camera to a door. If they come from another manufacturer and are ONVIF-compliant IP cameras, you can record them on a VORTEX NVR and bring their footage into Kisi through the VORTEX integration, which requires a VORTEX license that includes third-party integrations. Tailgating detection isn’t guaranteed on third-party cameras, so official VORTEX cameras are the safer choice for doors where that matters.
How do door readers work with security cameras? #
The reader and the camera don’t need to be wired together, because the access control platform ties them up in software. When someone taps a badge or phone at the reader, Kisi logs the event and asks the camera mapped to that door for snapshots or a clip, which then appear alongside the event in your history.
Do I need an NVR to integrate cameras with access control? #
Not with cloud-managed cameras such as Meraki, Rhombus or Eagle Eye, since their footage is fetched through the provider’s cloud. An NVR only comes into play when you want to bring third-party cameras into Kisi through VORTEX.
Can I manage cameras and doors across multiple locations from one dashboard? #
A single camera integration covers every camera in the same Kisi organization, and because each location sits in that organization as its own place, you can review door events and the footage attached to them for every site from one dashboard.
Integrate cameras with Kisi for better security #
Connecting your cameras to Kisi means every door event in your history comes with the image or clip that explains it, whether you run Meraki, VORTEX or a mix of brands across sites. Contact us to see which integration fits the cameras you already have.
Remotely review the footage for all important access events you get notified about, like a door being forced or propped open. Identify trends and vulnerabilities to prevent security breaches. Analyze suspicious behaviors and take corrective measures based on video evidence.
